November 14, 2014

Portraits of Nature - Hoffman Challenge Quilt 2013

Guess what finally made its way back home?  Yes!  My Hoffman Challenge Quilt from 2013. It had quite a bit of traveling to do, but has made it back home safe and I couldn't be happier. I have had a special place reserved for it's anticipated homecoming on one of my walls and it is now hanging there.  As I noted in an earlier post, I didn't really get to take any good pictures before it left for the competition so I have gone ahead and taken some photos which I will post here for your enjoyment.  If you are interested in reading up on the previous posts, they were from May 5, June 29 and Aug 3 2013. 

I would like to once again thank Mia for all of her beautiful digitizing.  Without her and her designs, this quilt would have never been completed.  I had known that I wanted to make it look like a wall of pictures hanging, but didn't know how to get some of the frames to look right.  Mia went about designing and digitizing some special frames for the pieces which I think turned out perfect.  All of the embroidery designs but one, are actually original designs digitized by Mia. 

I also actually sat down and free motioned all of the quilting something I don't normally do since I depend a lot on the embroidery machine's capability of doing that perfect.  It turned out pretty good I think, especially since most of it was done in metallic thread.  I hope you enjoy the pictures!

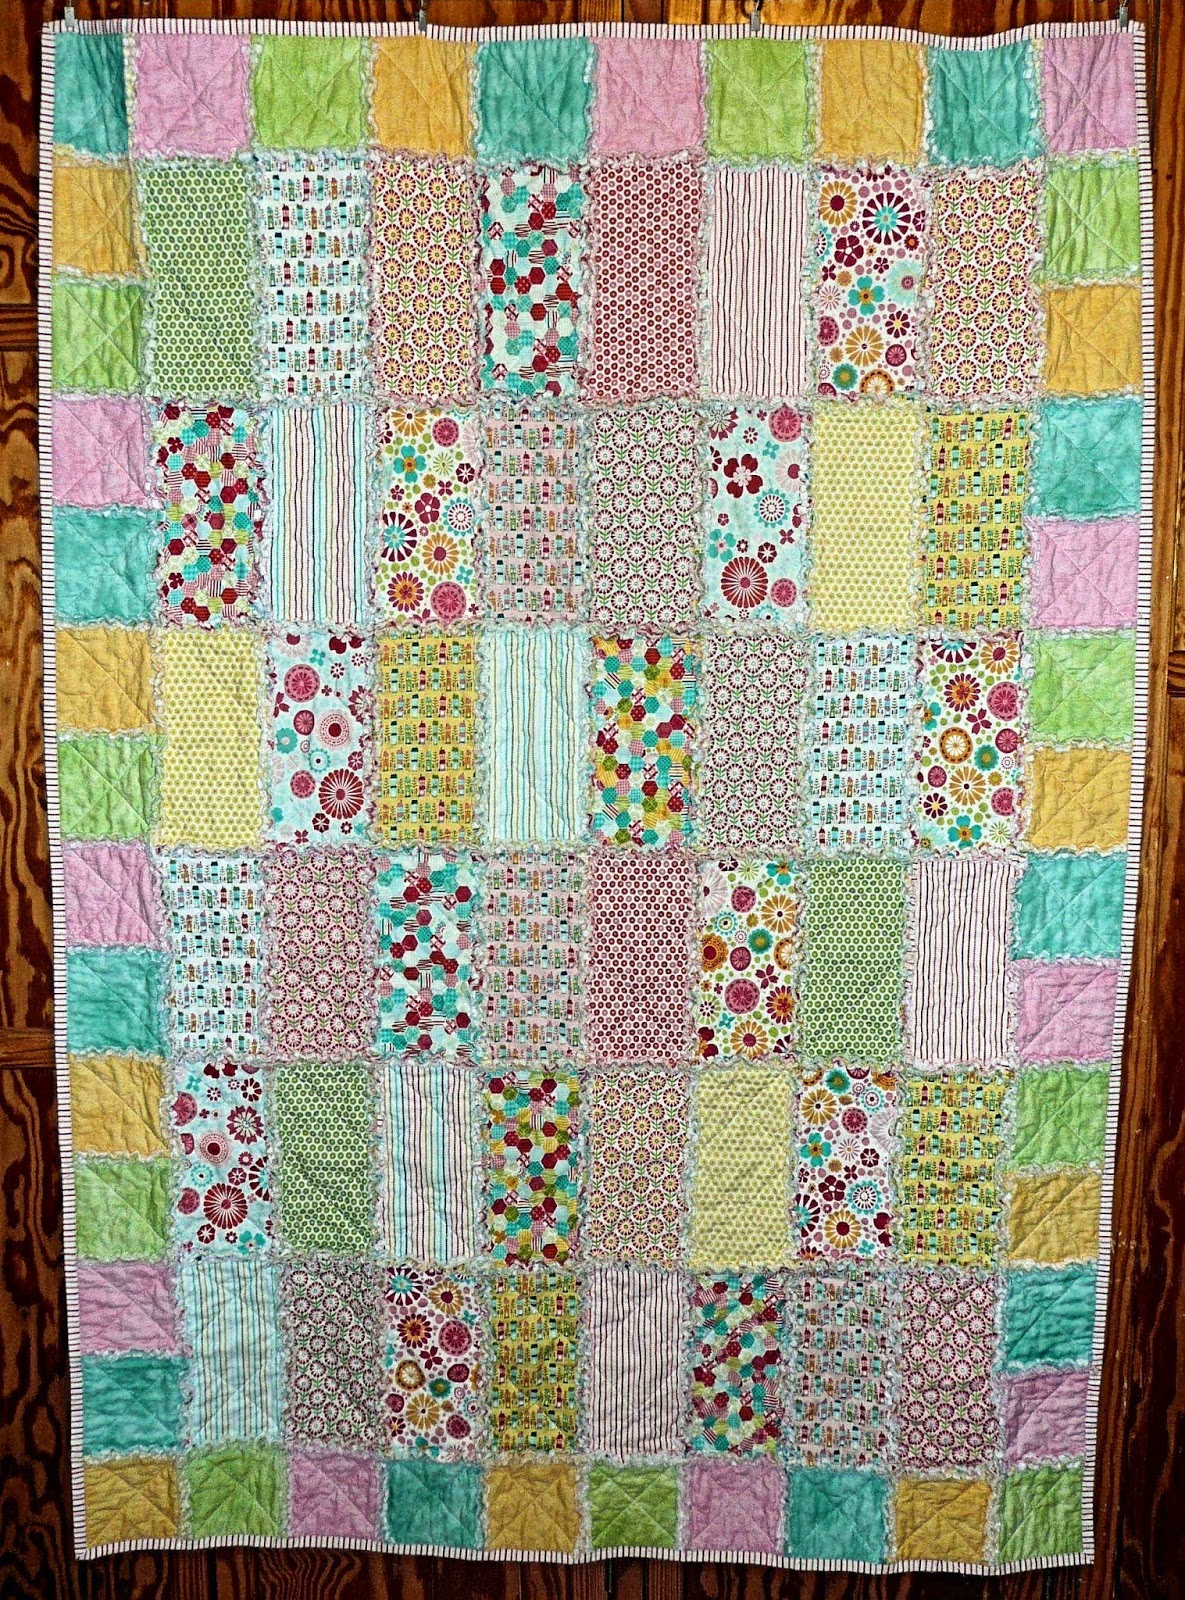
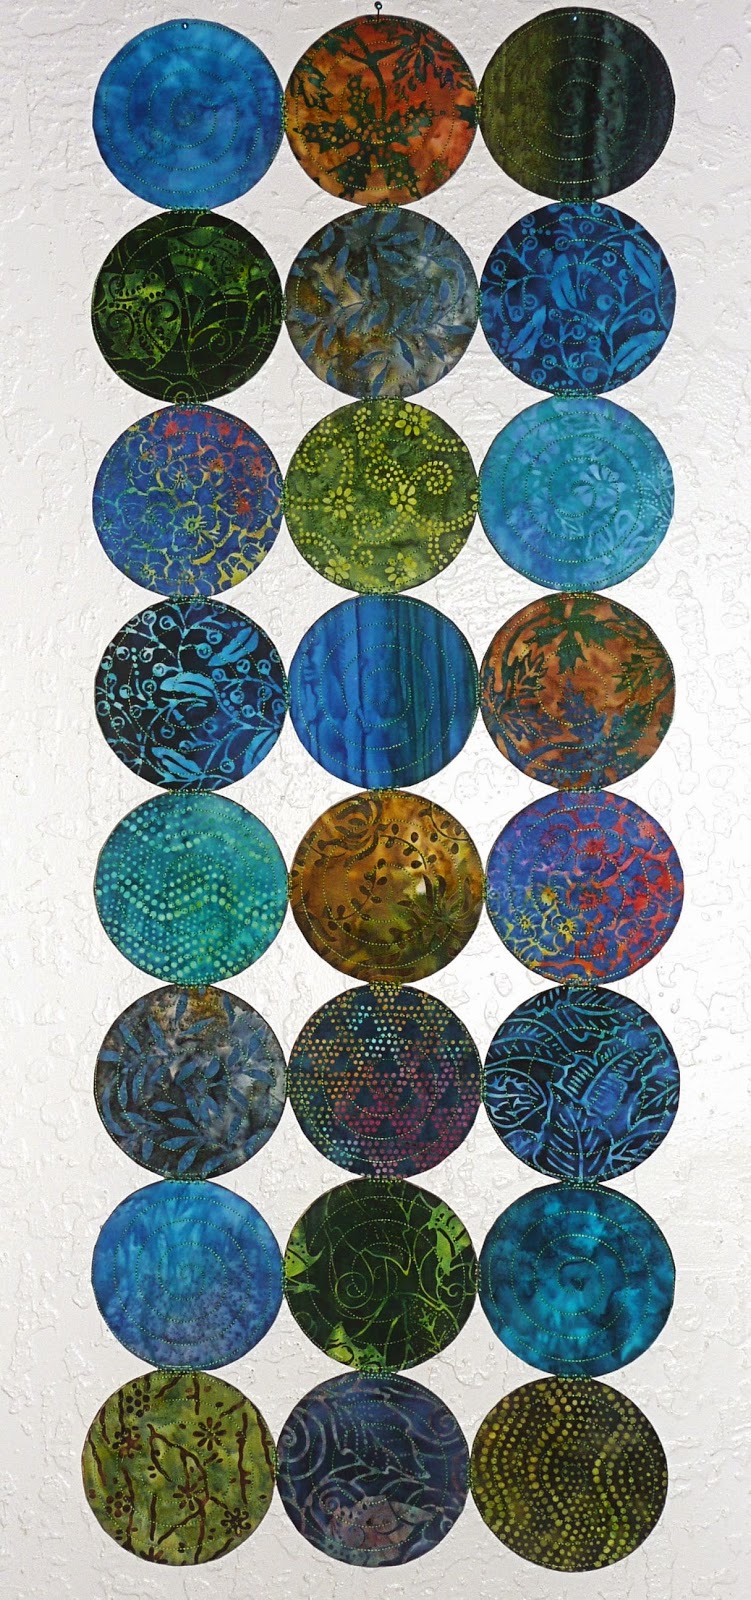
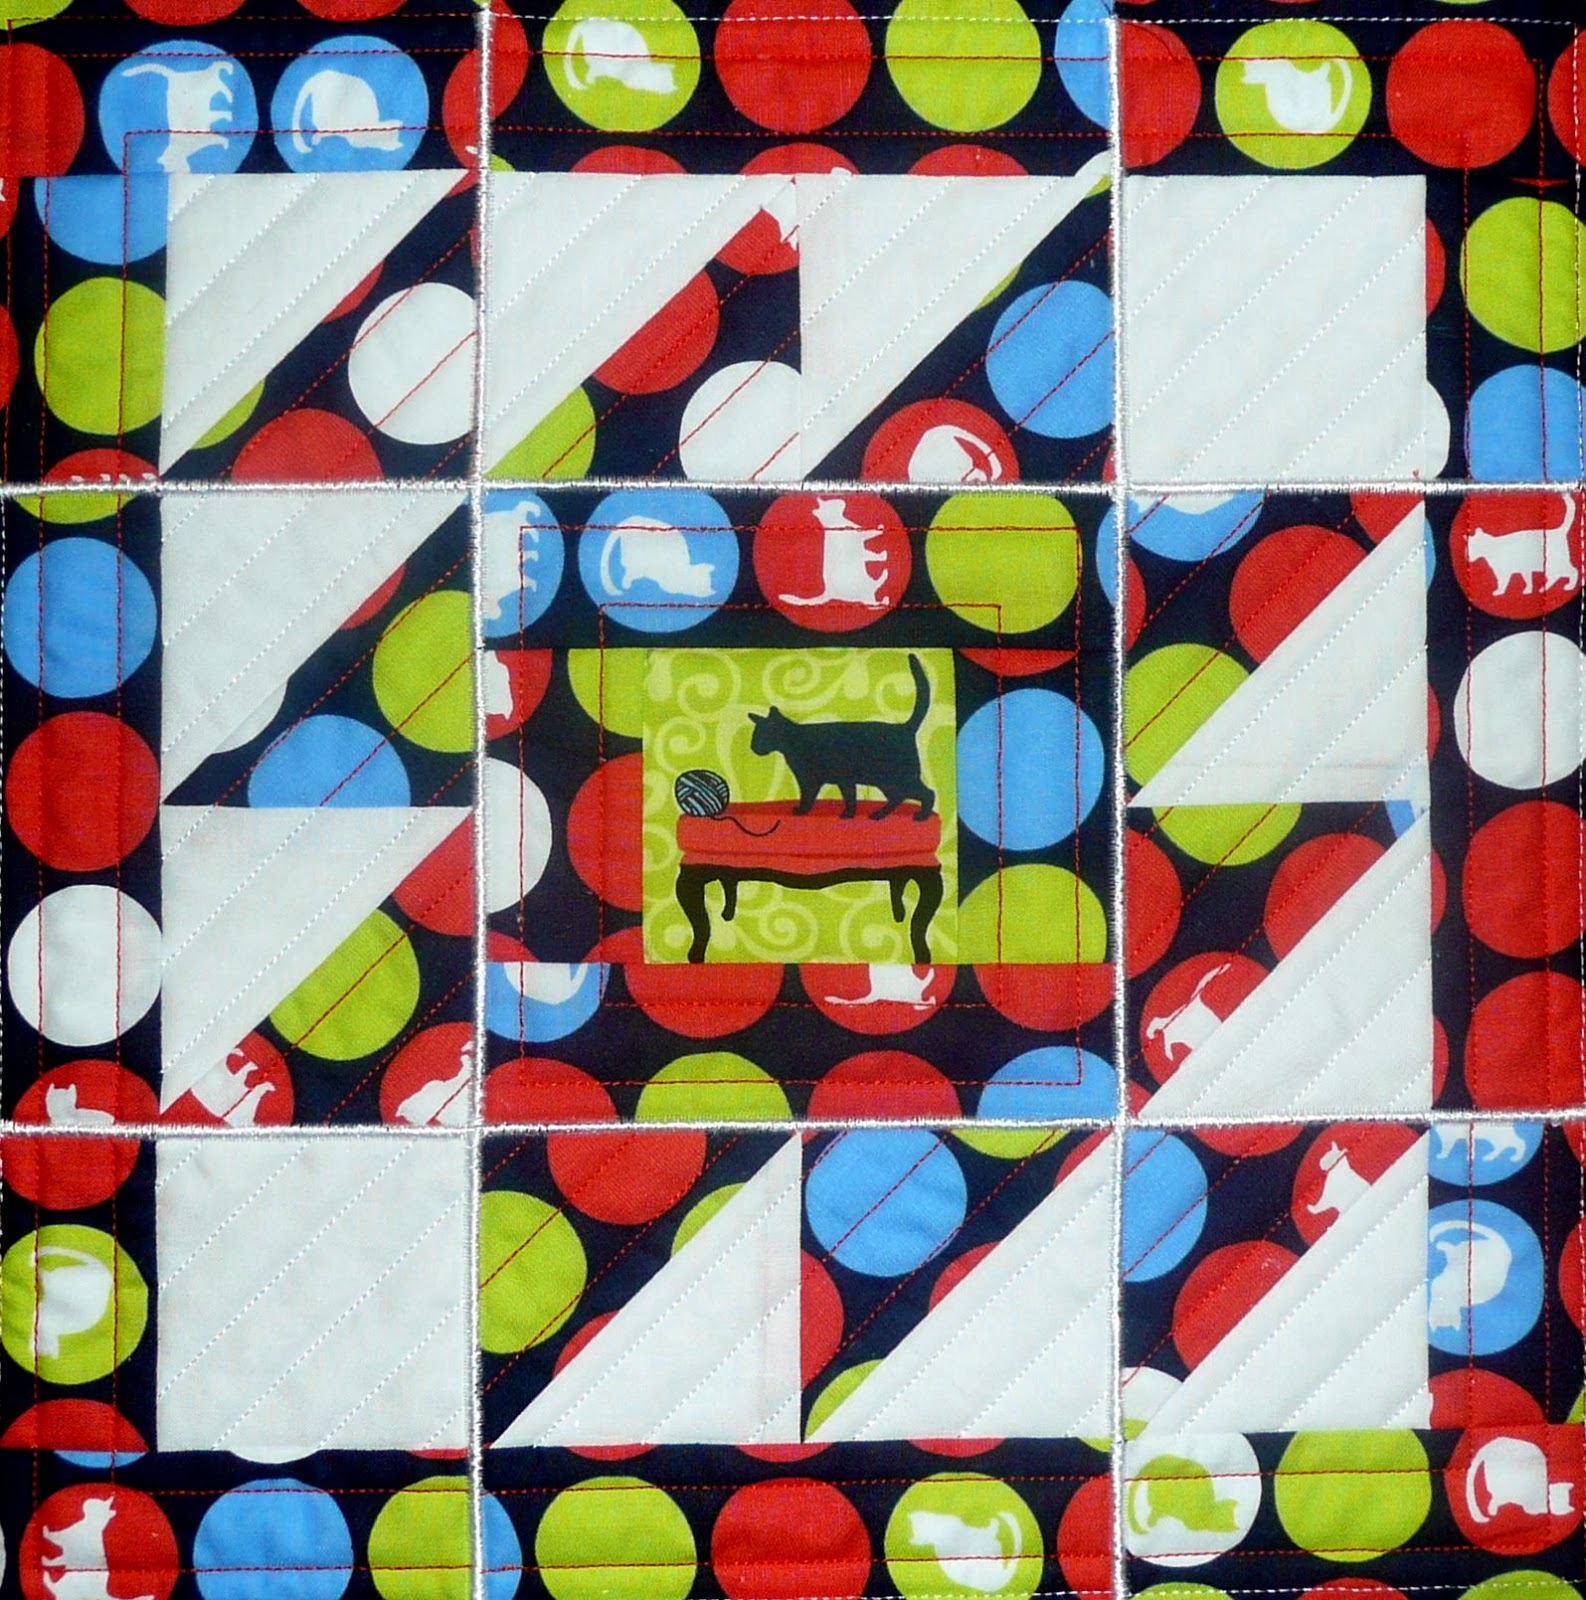
First up the whole quilt.


Next starting from the upper left hand corner, the bug panel, the small butterflies, and the large butterflies.


Then the bird stack, the bees, and the bird with a key.
 
 
Last the peacock feather (the one design that was not Mia's), the small dragonfly, and the large dragonfly panel.


I hope you enjoyed the show!  If you would like to see any more of Mia's designs, she does have a blog, The Accidental Embroider, which she gives a free embroidery design of her choice away each month. Her blog address is listed on the right side of my blog under 'Blogs I follow'.

September 22, 2014

Rag Quilt for Deb

Since I had such a great time making the rag quilt for little Emma, I decided that I would like to make my friend Deb one.  Deb has been my friend and hair dresser for years.  She is always doing nice things for me and everyone else.  I thought it would be nice if I did something for her.  I started making it as a birthday gift for her, but since I am just now delivering it, I guess its a belated birthday gift.  I hope she loves it and has many snuggly nights under it.

Deb's rag quilt has 10 inch rectangles in the middle and 5 inch square blocks surrounding them.  Emma's quilt was just 5 inch squares.  When I made Emma's quilt I didn't use a middle layer of fabric, just the two outside squares of fabric and then the batting.  For Deb's I used an extra layer of white fabric in between the two layers of outside fabrics and batting.  This gives it a little extra ruffle in the rag part of the quilt.  Traditional rag quilts usually have the outside of the quilt ragged also.  I choose to go ahead and bind mine, I think it gives it a much neater look.  After washing Deb's quilt it measures 47x66 inches.  The fabric is called 'So Happy Together' by Deena Rutter for Riley Blake Designs.
Here is the front of the quilt.
 
 
This close up shows the details a little better.
 
Here is the back view.
The Label.
 

Update!  Deb Loves her new quilt.  Here are a couple of pictures with her and one with her husband, Greg helping out holding it up. The photos were taken with my phone, so they aren't as good as the original pictures, but somebody (me) forgot to bring her camera.


August 02, 2014

Baby Rag Quilt

A friend of mine Gina, asked if I would like to make a baby quilt for her new granddaughter, Emma.   She has already been blessed with five boy grandbabies and Emma is her first girl grandbaby.  So she was very excited and wanted to have something special made for her.  Her daughter wanted something with yellow, gray, white and pink and the style needed to be shabby chic, so I immediately thought of a rag quilt.  I found some great fabrics in my stash that met her needs perfectly.  I think it turned out very nice.  I also appliqued her name on the front.  I hope Emma loves it!

Front View
Here is a close up of the blocks.

Here is the back view
 
 
UPDATE!!! Here is Emma with her new quilt!  Doesn't she look like a little doll baby?
 
 
And one more picture, her proud Grandmother Gina.


June 29, 2014

Circle Room Divider

Just finished a little test project that will one day turn into a bigger project.  I do admit to spending many hours surfing the internet, browsing magazines and books, and way to much time on Pinterest looking for inspiration.  I think I saw this project first in a magazine, but have now seen it in several different places.  Here is the photo that I saved into my inspiration file.

 
If I could remember where I got the photo I would be happy to give credit for it, and if I do run across it again, I will come back and do that.

My friend Chantell at http://www.chantells-creations.com/ has been doing several TIRSO (Turn It Right Side Out) sets with different shapes.  I think if you look back at some of my recent projects you will find some of those shapes, especially the hexagon.  When she decided to do the circle shape, I just knew I wanted to give this idea a try.  Here is the end result, and as I said earlier, its just a test to see if I want to make it much bigger.  I think it turned out very nice.  These circles are pretty small as I used a charm pack of batiks.  When I make the final project, I plan on making the circles using the 8 inch round version of the embroidery design.


Here is a close up of a couple of the blocks so that you can see the quilting detail in them.


May 29, 2014

Hexagon Table Topper

I really love the hexagon pieces that I have been making and decided that I needed one for myself.  I have a dresser in my bedroom that needed something for the top, so I thought that was a good place for me to make another hexagon piece.  I used a larger hexagon this time, and I added some applique flowers to the middle ones.  I love these colors which really don't match the colors in my bed room, but who cares? :-)
I took the picture on my kitchen floor, but only because the dresser is too tall to get a good picture.

Here is a close up picture of one of the middle hexagons.


I think I am done with hexagons for awhile.  I have been working a little here and there on the Charlie Harper quilt and hope to get it done soon. 

May 03, 2014

Some finished projects

Just a quick post today to show a few finished items.  This first one I made for Jackie for her sewing room.  It has been delivered so I can show it now.

The next one is a favorite of mine and several other friends.  It has a new home in Iowa, but hasn't been delivered yet.  Jackie's Aunt collects Blue Delft pieces and we think she is going to love it too.


Next up is a different pattern, but it is actually the same fabrics as the blue one, only it is the green version of the fabric.  It doesn't have a new home yet, but its looking for one!


These all were made using blocks from Chantell's Creations.  She has been working on a series of blocks that use the 'stitch and flip' method that she is calling 'Points'.  They stitch out like a dream as usual!

April 20, 2014

Hexagon Bed Runner

The King sized Bed Runner has been completed and delivered.  The new owner loves it!
Here is a picture of it just sitting on the floor.  You can't really tell much from this picture.


 So I just threw it across my unmade bed (which is also a King size) so you could see the size.

It measures 18 1/2 inches wide by 101 1/2 inches long.  I don't remember the exact number of hexagons, but it was over 100.  I made it from six packs of charm squares.  The back of each block is the same as the front.  I did make each hexagon in my embroidery machine and then stitched them all together with the sewing machine.

There has been lots of other stitching and sewing going on besides the bed runner.  I need to just finish up a few things (like binding, etc) and then I can take some pictures and post them here.

February 16, 2014

There really is stitching being done

Ok, so it was pointed out to me yesterday (Thanks Jackie) that I haven't blogged anything for over a month.  I really do need to share some pictures of projects just so you know that I haven't been idle.  I haven't been working on the things that I should be working on (but that is new how?)  Although, I have been working on one project that I was commissioned for, which is a good thing.  I have been working on a King sized bed runner made from hexagons.  I think I have made 80+ so far.  Here is a picture of just a few:
 
I also have been stitching some various blocks that will either be made into a quilt or wall hangings, or maybe even some individual pillows.  Here are a few of those.  This first one will probably be made into a pillow.  I am fascinated by the newspaper print fabrics.  I think they give a different look to projects that I would normally just use plain white fabric for.  All of these blocks were made using Chantell's Creations embroidery designs.


Next up are a few that will hopefully make it together in a wall hanging for my bedroom.  You might recognize this fabric from some pillows that I made for the bedroom earlier.


I was on a roll with this fabric and made a 'hot plate' mat for the kitchen.  I ended up hanging it on the side of my refrigerator.  It looks very nice there.


Then I made a couple of  ones that I will probably make into pillows using a fabric with some cats on it.  This comes in 3 colorways, so I am sure another one will show up soon.


Next up is a block I made while trying to decide how to move forward on the Charlie Harper quilt.  I was just playing around with some ideas.  I have a clear view of that quilt now and have been working on it in the background.  Once I have a little more stitched I will share.


There are a few more that I can't share yet.  Have to wait on Chantell to release the design files first. 

January 05, 2014

Quilting Charley Harper Style

I have been very attracted to the artistic style of the American illustrator Charley Harper since it was introduced to me awhile ago.  I thought it would be a great idea to make a quilt in a sort of tribute to Charley Harper.  Mia and I discussed the style of his art, which she also liked.  She digitized a panel of birds in a 'Charley Harper' style for the embroidery machine.  I had not had a chance to do anything with the panel yet since it wasn't 'calling' me.  Then I found out that Birch Fabrics were producing a line of fabrics using Charley Harper drawings as the designs.  I knew that I had to acquire some as soon as possible even though they were very expensive organic fabrics.  I was able to snatch a fat quarter of each fabric, plus a couple of 1/2 yard pieces too.


I was struggling with a quilt design that would best 'showcase' the fabrics and the designs.  I decided that the best way to get started was to embroidery the 8 panels first.  I have finished stitching them and here they are.  They are not yet sewn together, but you should get the idea. I decided to choose some of the colors in the fabrics to stitch the leaves and I used some of the fabric for the applique part of the birds.  Hopefully when all of the fabrics are put together, everything will blend and look good.


Now, my next job is to design a 'quilt' around them.  I think I have some good ideas on how to proceed and I am going to get started working on them right away.